
All Forum Comments

Comment by Prieni posted on Four trees in Herts. at 15/01/2010 - 08:06
Did you find the competition thread? (There is a link to it in the third post here)
And in this thread you find some tips on how to get your photo in one of these threads.
Good luck
And in this thread you find some tips on how to get your photo in one of these threads.
Good luck
Comment by Prieni posted on Fortnightly Compet. COMMENTS # 33 - STAIRS at 14/01/2010 - 20:42
Very nice indeed!
Haven't seen the first version but I think Kris' comments did help.
Prieni
Haven't seen the first version but I think Kris' comments did help.
Prieni
Comment by Prieni posted on Stormy Farm View at 14/01/2010 - 20:38
No, excellent theme, I think. As always the problem is in realising one's idea and finding the right light.
I have a backup plan in the drawer.
Prieni
I have a backup plan in the drawer.
Prieni
Comment by Prieni posted on Fortnightly Compet. COMMENTS # 33 - STAIRS at 14/01/2010 - 20:35
Quite decent pics for the difficult light for highly mobile subjects!
Yes, you can have EXIF with Photobucket, all of the above shots except the first one have the EXIF with them (FxIF add-on on Firefox does show them when right clicking and choosing properties from the context menu.
I think the first shot is fine, it is a night race after all. To brighten up you can put a white layer on top and choose layer mode soft light. Then turn the opacity back. Of course you can paint in a layer mask for those areas you don't want any lighter.
I like the last shot with the light trails. You could have done a series of exposures and combine them to bring out more detail in the surroundings.
Prieni
Yes, you can have EXIF with Photobucket, all of the above shots except the first one have the EXIF with them (FxIF add-on on Firefox does show them when right clicking and choosing properties from the context menu.
I think the first shot is fine, it is a night race after all. To brighten up you can put a white layer on top and choose layer mode soft light. Then turn the opacity back. Of course you can paint in a layer mask for those areas you don't want any lighter.
I like the last shot with the light trails. You could have done a series of exposures and combine them to bring out more detail in the surroundings.
Prieni
Kris,
good question. As I recently downloaded the trial version of Photomatix Pro I gave it a spin:
[IMG]http://i156.photobucket.com/albums/t5/Prieni/howto%20night%20shot/_PRI7779And9moreEnhancer.jpg[/IMG]
Not too shabby I would say. And bear in mind that I have not much clue about the settings of it, yet.
I think this result is even better balanced. And it was a fair bit quicker than my manual approach. If I had to find fault with it I would say it is a tad too saturated. But not something that couldn't be adjusted in a whiff.
Thanks for tempting me to this trial, Kris.
Prieni
good question. As I recently downloaded the trial version of Photomatix Pro I gave it a spin:
[IMG]http://i156.photobucket.com/albums/t5/Prieni/howto%20night%20shot/_PRI7779And9moreEnhancer.jpg[/IMG]
Not too shabby I would say. And bear in mind that I have not much clue about the settings of it, yet.
I think this result is even better balanced. And it was a fair bit quicker than my manual approach. If I had to find fault with it I would say it is a tad too saturated. But not something that couldn't be adjusted in a whiff.
Thanks for tempting me to this trial, Kris.
Prieni
Comment by Prieni posted on Manual HDR - night shots at 12/01/2010 - 21:03
Hmmm, I get your drift. Much appreciated!
I do like that version, too (though it needs the final sharpening). I did think of it as the finished product when I thought of trying the local equalisation on this one.
And once I have applied this effect it is too late, I find it very hard to go back to the version without it.
On the subject: While the Fullerton Hotel clearly is the focal point, one of the reasons of framing the picture in this way was exactly the bright and bustling city scenery. It also touches some of the well known sights such as the Esplanade (roof in the lower right corner), Esplanade bridge (the broad one), Anderson and Cavenagh bridge on the right and of course the water spouting Merlion.
Anderson and Esplanade bridge, by the way, are part of the Formula 1 circuit of Singapore.
Prieni
I do like that version, too (though it needs the final sharpening). I did think of it as the finished product when I thought of trying the local equalisation on this one.
And once I have applied this effect it is too late, I find it very hard to go back to the version without it.
On the subject: While the Fullerton Hotel clearly is the focal point, one of the reasons of framing the picture in this way was exactly the bright and bustling city scenery. It also touches some of the well known sights such as the Esplanade (roof in the lower right corner), Esplanade bridge (the broad one), Anderson and Cavenagh bridge on the right and of course the water spouting Merlion.
Anderson and Esplanade bridge, by the way, are part of the Formula 1 circuit of Singapore.
Prieni
Comment by Prieni posted on Manual HDR - night shots at 12/01/2010 - 20:26
Well, either perseverance finally paid off (as I had never reached that level before) or I just got lucky. Only time will tell...
I just hope it wasn't just luck.
Prieni
P.S.: I put a more elaborate description on the PP in this thread.
I just hope it wasn't just luck.
Prieni
P.S.: I put a more elaborate description on the PP in this thread.
Comment by Prieni posted on Singapore night shots at 12/01/2010 - 19:10
As I wrote up the process for the night shots that I took in Singapore for ....ehm... another forum ... I thought I might as well repeat it here:
The method I use is basically a form of exposure stacking. From a series of exposures you pick the right exposure for the different parts of the shot.
First prerequisite is of course an interesting scene to shoot. As I was in Singapore for a holiday there was no shortage of that. The example here is the Fullerton Hotel at Marina Bay. I did shoot this scene on the very first evening from the hotel balcony.
First you need a stable tripod. Then select the scenery and tighten all the knobs on the tripod. Focus carefully (sometimes not easy in the dark).
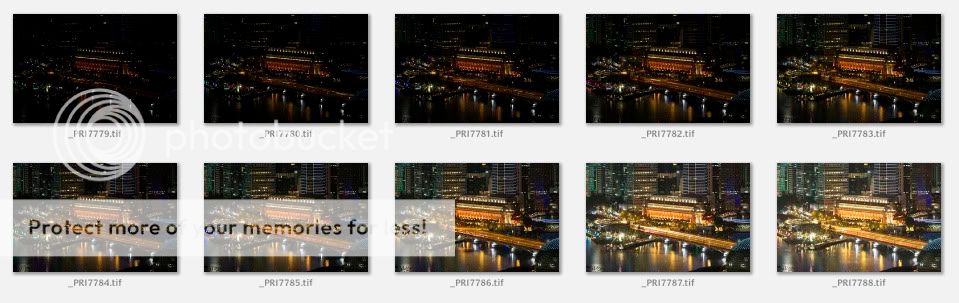
I did a series of exposures, using aperture priority at A8.0 and -2.5 to +2.0 EV in steps of 0.5 EV. So I ended up with ten exposures:
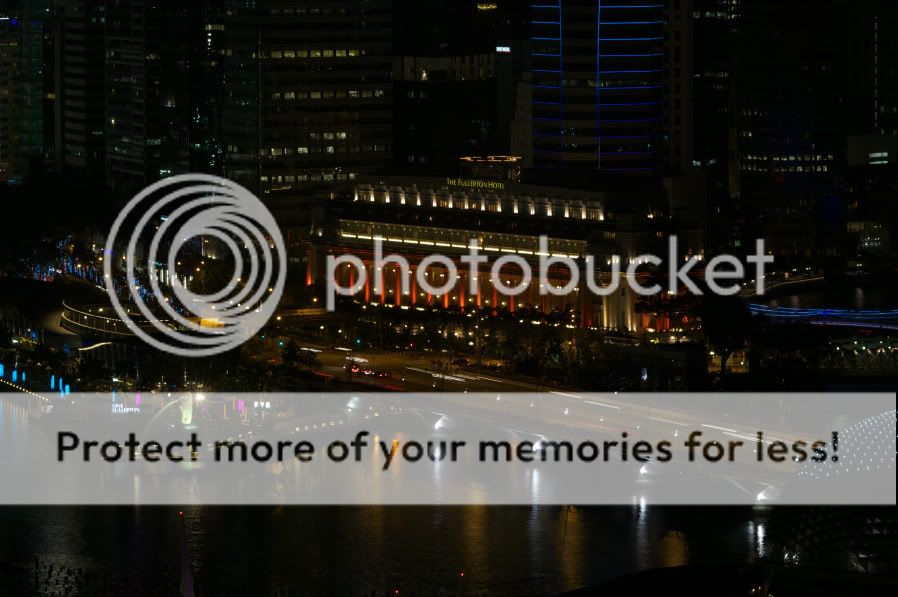
This is the darkest:
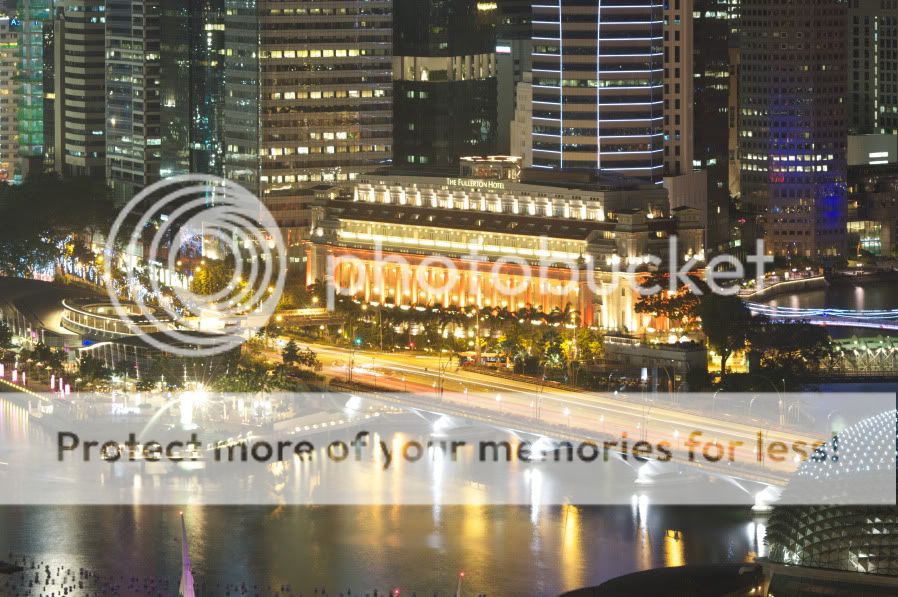
And this the brightest:
All were developed to TIFFs in SilkyPix from the RAW images. The technique should work equally well with JPGs, though.
Next I loaded them up in Photoshop, starting with the darkest (-2.5 EV). Then I opened the -2.0 EV exposure and put it on the first one as a new layer. On top of that the -1.5 EV one and so on. So I end up with seeing the brightest one on top. I selected that top layer.
Now I selected all the bright parts in the image (Select, Color range, highlights works but CTRL+SHIFT+ALT+~ does the trick as well).
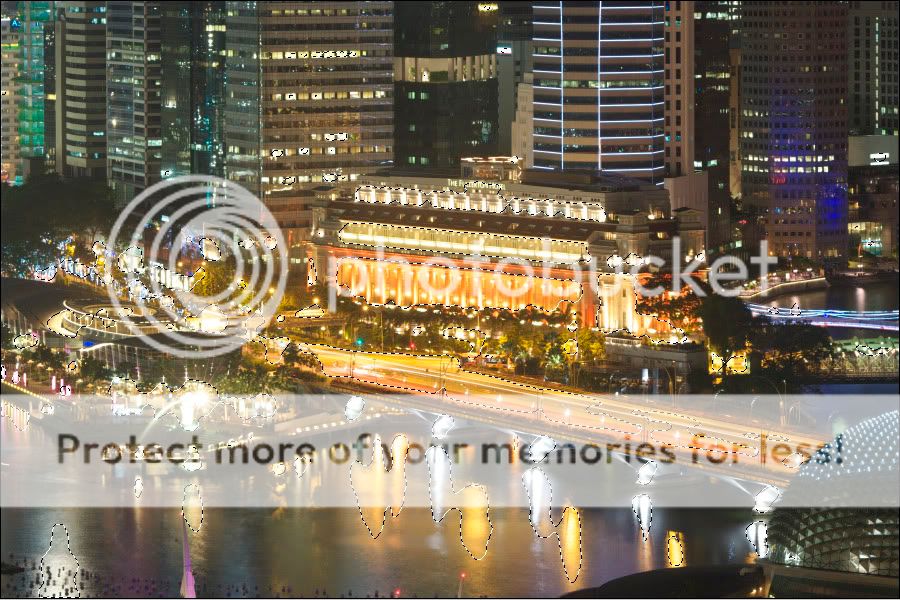
You see the selection "ant-street" around the bright parts. Now I used the Feather... command from the Select menu at 30 pixels and then I added a layer mask with "hide selection" option.
Here is what the result looks like when you use a pure black background layer. Remember, this was the brightest exposure and what you see here is the contribution to the finished product:

You can see how all the overexposed parts have disappeared.
While leaving the top layer (that I just worked on) enabled, I now select one layer down (the +1.5 EV exposure) and start the same process again (CTRL+SHIFT+ALT+~, then feather 28, i.e. a bit less than before, add layer mask "hide selection").
And in this way I work my way down the layers. The result then is this image:
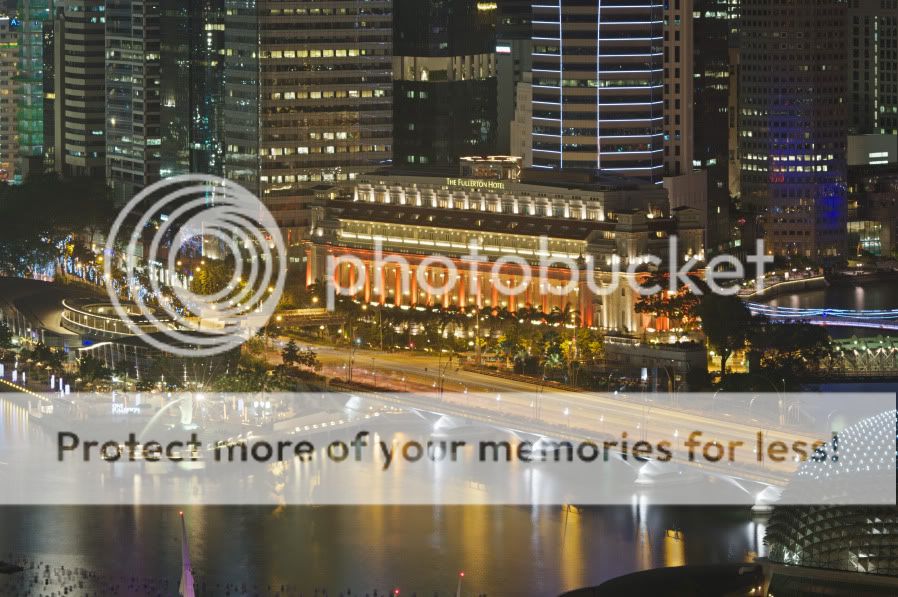
Now is the right time to save that result and flatten the image (10 layers plus masks at the image size of the K20D does take some memory).
Almost ready...
Now I took the brightest exposure and loaded it into Corel PhotoPaint. This has an image adjust function called local equalisation, which I use quite frequently. It brings out the local contrast of an image. The result is an image that looks like drawn with colour pencils:
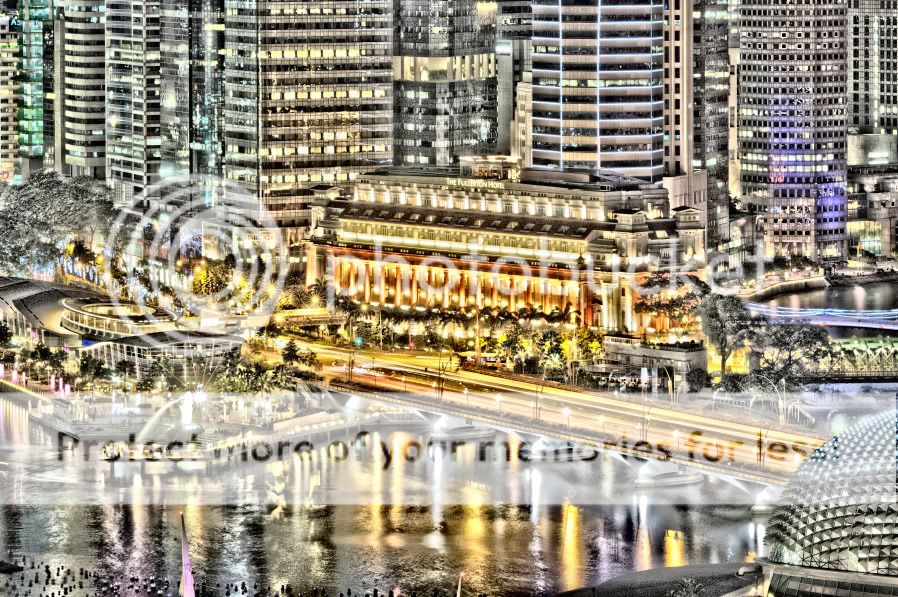
That is loaded into Photoshop again and put on top of the (now flattened) result. Layer mode switched to "soft light". Now I took back the opacity a bit (to around 40% for this image).
Saving, resizing and a bit of unsharp mask and the image is ready:
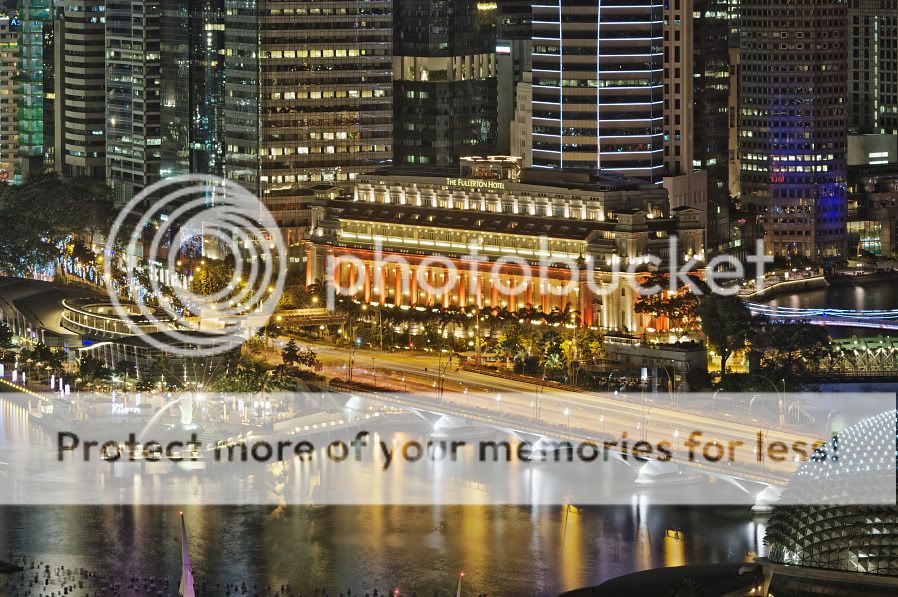
Of course you can apply a bit of curve correction, de-saturation (putting on the local equalisation layer sometimes over-saturates the result which might not be fitting for all images) or whatever you fancy.
It also is interesting to see what a bit of curve correction in one of the masks does for the image. That way you can fine-tune the lights a bit.
I had used this method before but only on three or four exposures. I probably didn't take bright enough ones also. This time round I am satisfied with the results. I will go out around home some time soon and test this method on my home turf.
Hope my ramblings make sense to you,
Prieni
P.S.: The images are a bit sharper when you click on them.
The method I use is basically a form of exposure stacking. From a series of exposures you pick the right exposure for the different parts of the shot.
First prerequisite is of course an interesting scene to shoot. As I was in Singapore for a holiday there was no shortage of that. The example here is the Fullerton Hotel at Marina Bay. I did shoot this scene on the very first evening from the hotel balcony.
First you need a stable tripod. Then select the scenery and tighten all the knobs on the tripod. Focus carefully (sometimes not easy in the dark).
I did a series of exposures, using aperture priority at A8.0 and -2.5 to +2.0 EV in steps of 0.5 EV. So I ended up with ten exposures:

This is the darkest:

And this the brightest:

All were developed to TIFFs in SilkyPix from the RAW images. The technique should work equally well with JPGs, though.
Next I loaded them up in Photoshop, starting with the darkest (-2.5 EV). Then I opened the -2.0 EV exposure and put it on the first one as a new layer. On top of that the -1.5 EV one and so on. So I end up with seeing the brightest one on top. I selected that top layer.
Now I selected all the bright parts in the image (Select, Color range, highlights works but CTRL+SHIFT+ALT+~ does the trick as well).

You see the selection "ant-street" around the bright parts. Now I used the Feather... command from the Select menu at 30 pixels and then I added a layer mask with "hide selection" option.
Here is what the result looks like when you use a pure black background layer. Remember, this was the brightest exposure and what you see here is the contribution to the finished product:

You can see how all the overexposed parts have disappeared.
While leaving the top layer (that I just worked on) enabled, I now select one layer down (the +1.5 EV exposure) and start the same process again (CTRL+SHIFT+ALT+~, then feather 28, i.e. a bit less than before, add layer mask "hide selection").
And in this way I work my way down the layers. The result then is this image:

Now is the right time to save that result and flatten the image (10 layers plus masks at the image size of the K20D does take some memory).
Almost ready...
Now I took the brightest exposure and loaded it into Corel PhotoPaint. This has an image adjust function called local equalisation, which I use quite frequently. It brings out the local contrast of an image. The result is an image that looks like drawn with colour pencils:

That is loaded into Photoshop again and put on top of the (now flattened) result. Layer mode switched to "soft light". Now I took back the opacity a bit (to around 40% for this image).
Saving, resizing and a bit of unsharp mask and the image is ready:

Of course you can apply a bit of curve correction, de-saturation (putting on the local equalisation layer sometimes over-saturates the result which might not be fitting for all images) or whatever you fancy.
It also is interesting to see what a bit of curve correction in one of the masks does for the image. That way you can fine-tune the lights a bit.
I had used this method before but only on three or four exposures. I probably didn't take bright enough ones also. This time round I am satisfied with the results. I will go out around home some time soon and test this method on my home turf.
Hope my ramblings make sense to you,
Prieni
P.S.: The images are a bit sharper when you click on them.
Comment by Prieni posted on Manual HDR - night shots at 12/01/2010 - 14:41
There is now HDR in the list of categories:
Photos must be selected for one or more of the following categories: Abstract, B&W, Cityscape/Urban, Documentary, Glamour/Fashion, HDR, In-Camera Effects, Landscapes, Lifestyle, Macro, Nature, Portraiture, Sports/Action, Travel, Food.
Prieni
Photos must be selected for one or more of the following categories: Abstract, B&W, Cityscape/Urban, Documentary, Glamour/Fashion, HDR, In-Camera Effects, Landscapes, Lifestyle, Macro, Nature, Portraiture, Sports/Action, Travel, Food.
Prieni


Prieni